Deep vs Shallow Depth

by Hailey Plummer

This week I practiced using the aperture setting on my camera. I was already quite familiar with this, but I needed to work on gaining a muscle memory for changing this setting quickly. When adjusting the aperture, opening it (lowering the number) will allow the depth of field to be shallower. This is great for close up shots with blurry backgrounds. I used a lower aperture for the closer up shots of the rocks and the plant in the grass. This kept the foreground blurry and the subject in focus. Opposite to opening the aperture, closing it (raising the number) will make the depth of field deeper. This puts more of the photo in focus. I used the higher aperture setting on my camera to put all of the photo in focus. This was great for two of the photos I took because the whole landscape was clear.

Shallow Depth of Field

Stack of Rocks
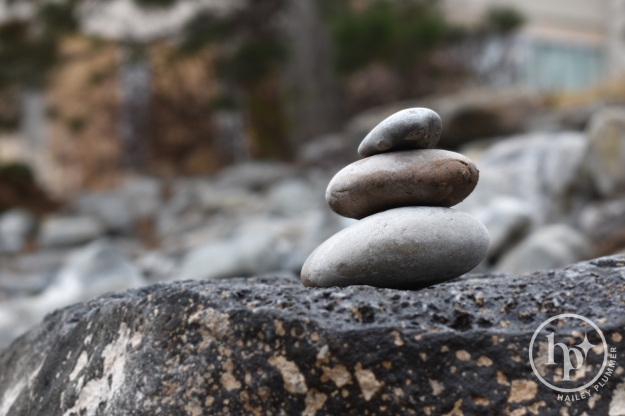
4/28/22, 10:35am, BYU-Idaho, 50mm, f/4.5, 1/250 sec, ISO 100, Nikon D3400

Grow’n in the Grass

5/4/22, 11:52 am, BYU-Idaho, 55mm, f/5, 1/4000 sec, ISO 200, Nikon D3400

Deep Depth of Field

Garden in Yellow

5/16/22, 10:06am, BYU-Idaho, 50mm, f/16, 1/100 sec, ISO 200, Nikon D3400

Orchard Aisle

4/16/22, 10:10am, BYU-Idaho, 50mm, f/16, 1/125 sec, ISO 200, Nikon D3400

Life in Motion

by Hailey Plummer

This week I have learned about the many uses for motion in creative photography. I took several photos implementing this use of motion through cards falling in the air, splashing water, and bright lines of light. To achieve this, I practiced using my different camera settings that change exposure. The aperture and shutter speed gave me power as the photographer so that I could be in control of light coming into the camera.

Frozen Motion

Ten of Hearts

5/3/22, 8:33pm, Abri Townhouses, 50mm, f/1.8, 1/200 sec, ISO 100, Nikon D3400, using a tripod & flash

After many attempts, I got this clean shot of cards falling from my hand.

Rock Bottom

4/27/22, 11:29:am, BYU-Idaho, 50mm, f/9.0, 1/800 sec, ISO 800, Nikon D3400

This puddle splash from a rock I threw was taken outside in overcast daylight

Blurred Motion

From the Wall

5/3/22, 8:48pm, Abri Townhouses, 50mm, f/16, 5.0 sec, ISO 100, Nikon D3400, using a tripod

This light painting was taken in front of an outlet in my kitchen with my phone flashlight

Off the Wall

5/5/22, 6:48pm, Abri Townhouses, 50mm, f/1.8, 4.0 sec, ISO 100, Nikon D3400, using a tripod

This blurred self-portrait was taken with a double exposure, it’s done in my living room using an orange lamp

Camera Settings in Depth & Motion

by Hailey Plummer

To show the differences within depth and motion using DSLR camera settings, I have compiled photos from unspash.com. These visual examples of aperture and shutter speed help understand the different principles.

Wide Aperture Example

Wide Aperture

In the image to the left, the subject is in focus and the background is blurry. This does mean that the face was in focus, but also that the aperture was set to a wider setting. Opening the f-stop is great for portraits. To take photos with this soft, blurry background, more light needs to be let in. To widen the aperture, set it to a lower number. For example: f/2.8.

Wide Aperture Example

Narrow Aperture Example

Narrow Aperture

In this image, both the subject and the background are in focus. This means that the aperture was set to a narrower setting. This is great for landscapes and scenery because there are broader details and no blur. This is done by setting a higher f-stop on the camera. For example, f/22 will bring background details into focus.

Narrow Aperture Example

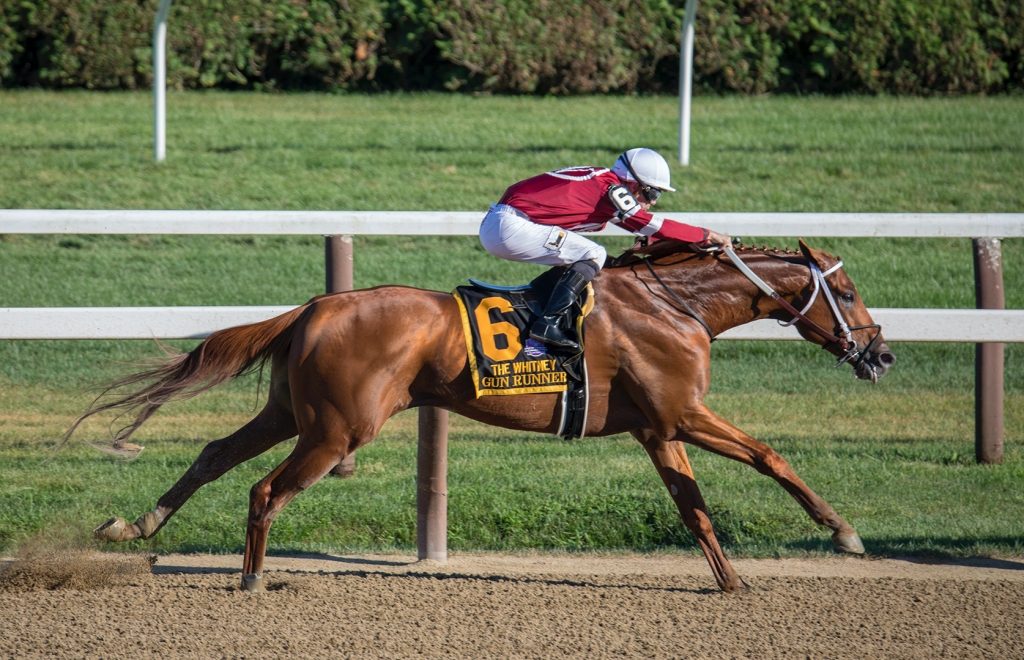
Fast Shutter Speed

Fast Shutter Speed Example

In the image of the horse racing, the subject is clear without any blurs of motion. To get a crisp photo like this, the shutter speed needs to be quick. In the camera settings, a fast shutter speed will be a smaller fraction. For example: 1/800 is a faster shutter speed than 1/80. This is great for freezing motion in sports photography.

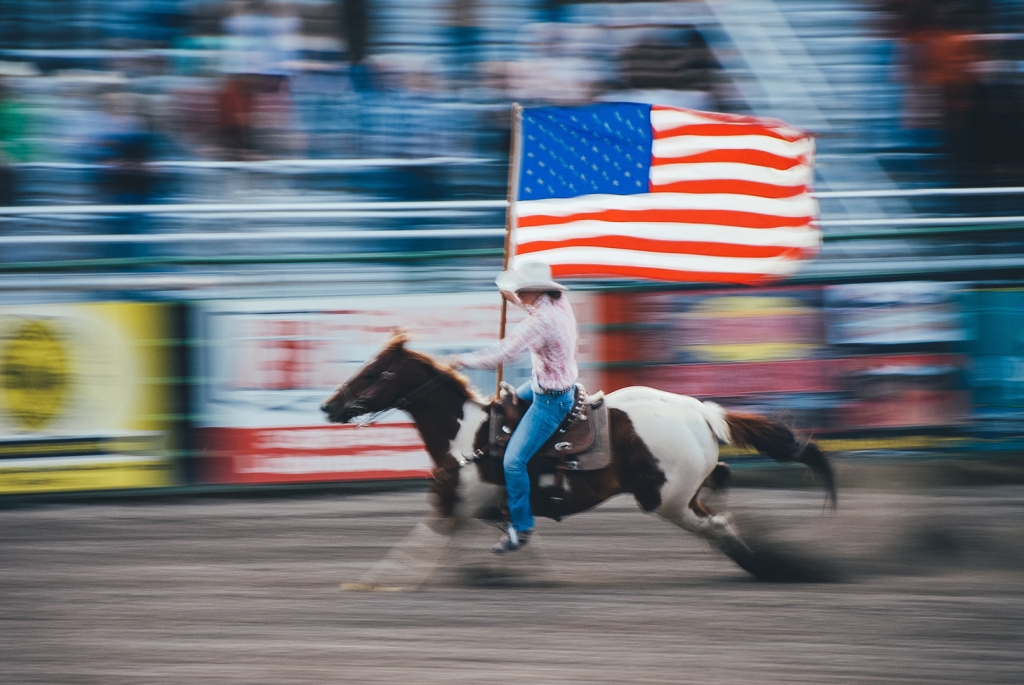
Slow Shutter Speed

Slow Shutter Speed Example

This entire image above is blurry. With a slow shutter speed and movement happening, the photo comes out blurry. This is because the shutter let in more light during the longer exposure time. The blur isn’t always preferred, but sometimes it can add movement to the subject. To set the camera to a slower shutter speed, (this depends on movement) the fraction will likely need to be larger than 1/100.

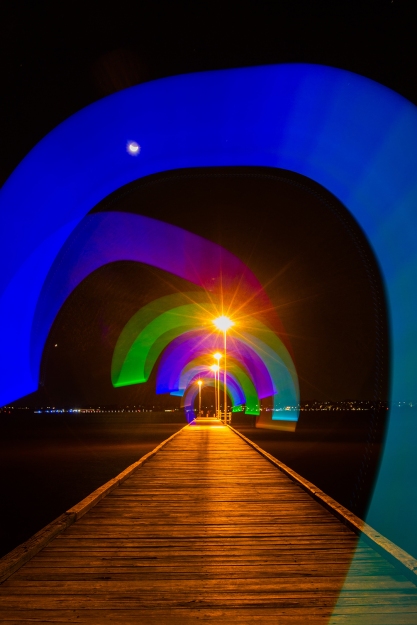
Light Painting Example

Long Shutter Speeds

Also known as light painting, this is a form of photography using the power of the shutter speed! To create a unique image, the shutter is left open for a period of time, allowing more light into the camera. This allows the shutter to be open up to more than 30 seconds. When taken in a dark setting like the photo, using a handheld light to “paint” lines during the exposure creates a beautiful image.

Light Painting Example